Today, I completed my Indian Rug-inspired set with a pair of dangle earrings. My set was inspired by the Anne Repath painting posted at artbeadscene during August 2014. I took a series of pictures along the way to show you how I made these.
First, this natural grey Silk thread was the perfect stringing material. Waxed linen was too thick and wires were too stiff for the look I wanted to achieve. The soft grey color was a perfect compliment to the beads and the Redpath artwork, too. For the set of earrings, I used about 12-14 inches of Silk total (about 6-7 inches per earring).
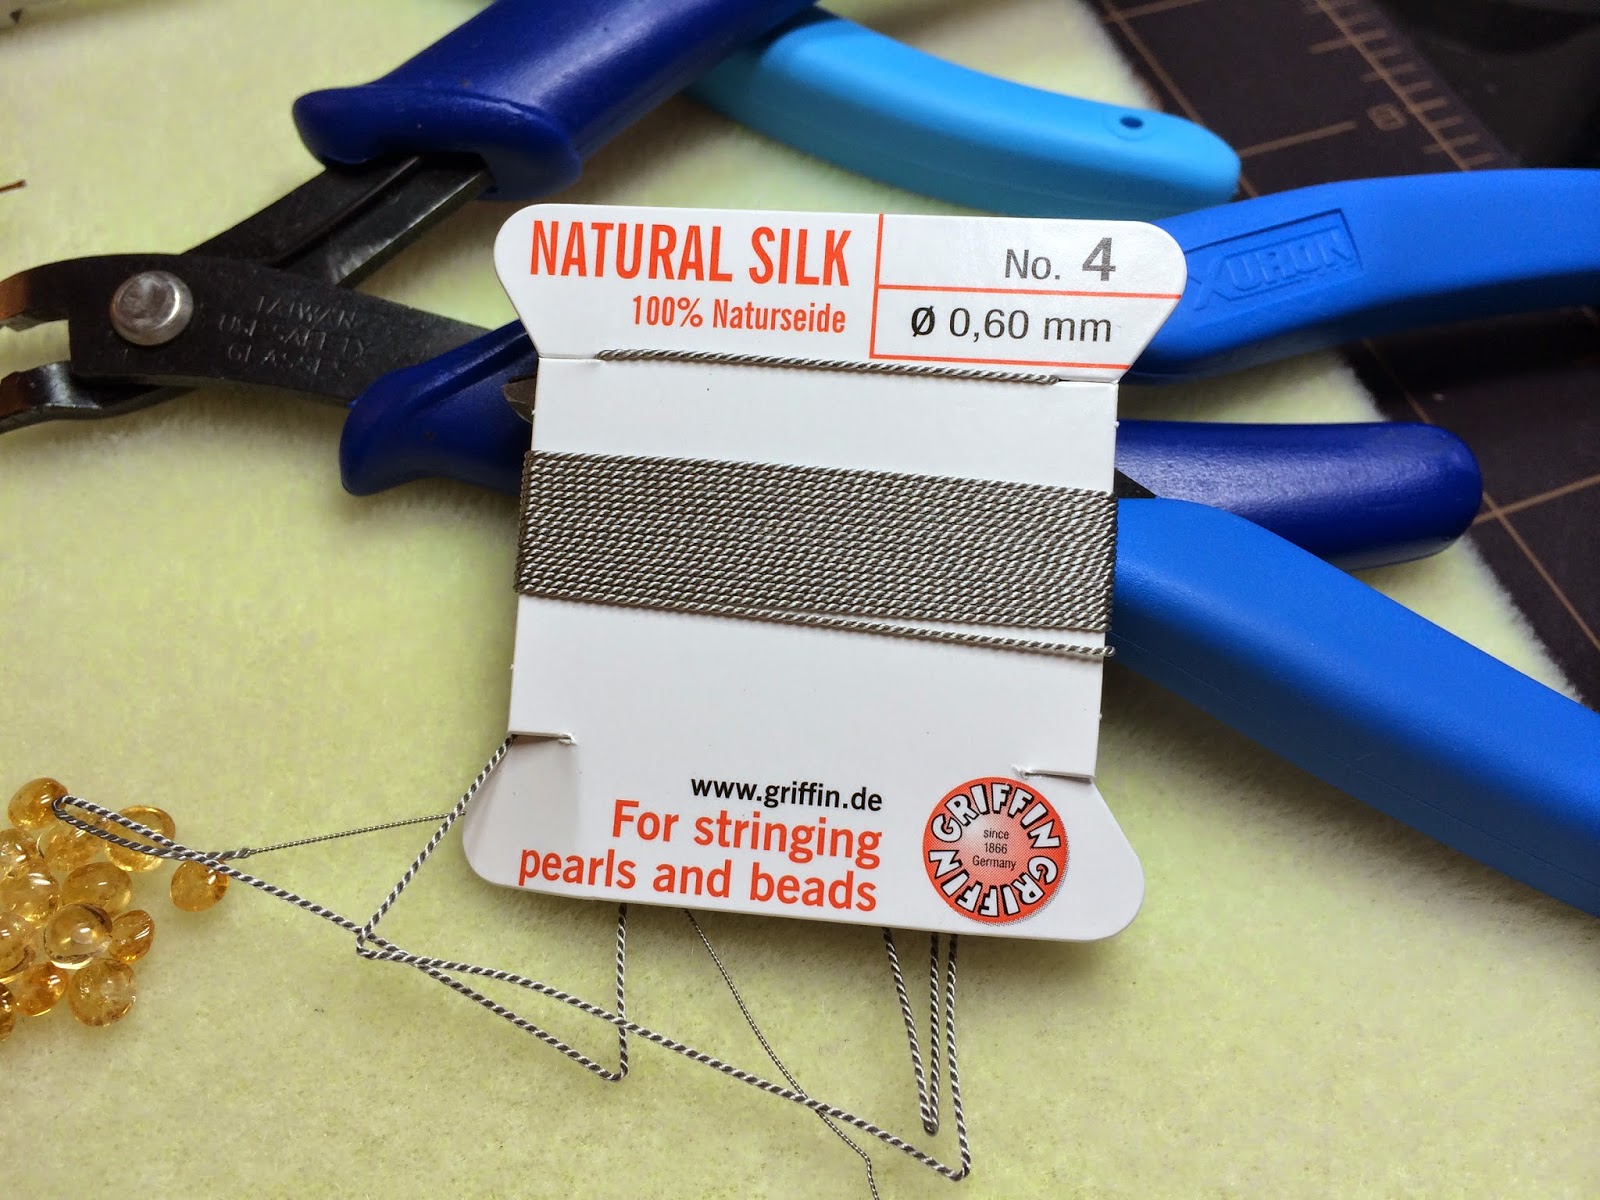
Here are the rest of the 'ingredients':
Two 4mm round Swarovski Crystals in Montana Blue
Four 3-4mm gemstone chips - Citrine
2 gold ear wires
2 gold jump rings (you could use any size jump ring; mine are 'open' rings)
2 Wild Rose Polymer Clay Beads from TreeWingsStudio
6 Vintage Silvery Grey Ruffled Rondelles from beadbrats - 3 per earring
Tools:
A pair of sharp scissors to cut the Silk thread
A large-hole 'easy thread' needle
Chain-nose or Flat-nose pliers to open/close the jump rings
Optional - HypoCement
For the fist earring:
Cut about 6-7 inches of Silk from the card. Slip the Silk through one crystal to form a simple loop:

In the photo below, you can see my large-hole needle. This is a fantastic tool! It makes slipping thread though a small beading hole so much easier (and makes work for those who need 'vision-correction' a breeze...bifocals...me!). Make a simple over-hand knot above the crystal. Leave a nice little loop above the over-hand knot:

Thread a rondelle bead. Snug-up the beads and then make another over-hand knot below the rondelle.

Thread a Wild Rose bead. Turn the piece to the 'wrong side' and snug-up those beads, again! Tie another over-hand knot and snug-up this knot as close as possible to the base of the Wild Rose bead. I just used the tips of my fingers to gently 'coax' the knot into the proper position:
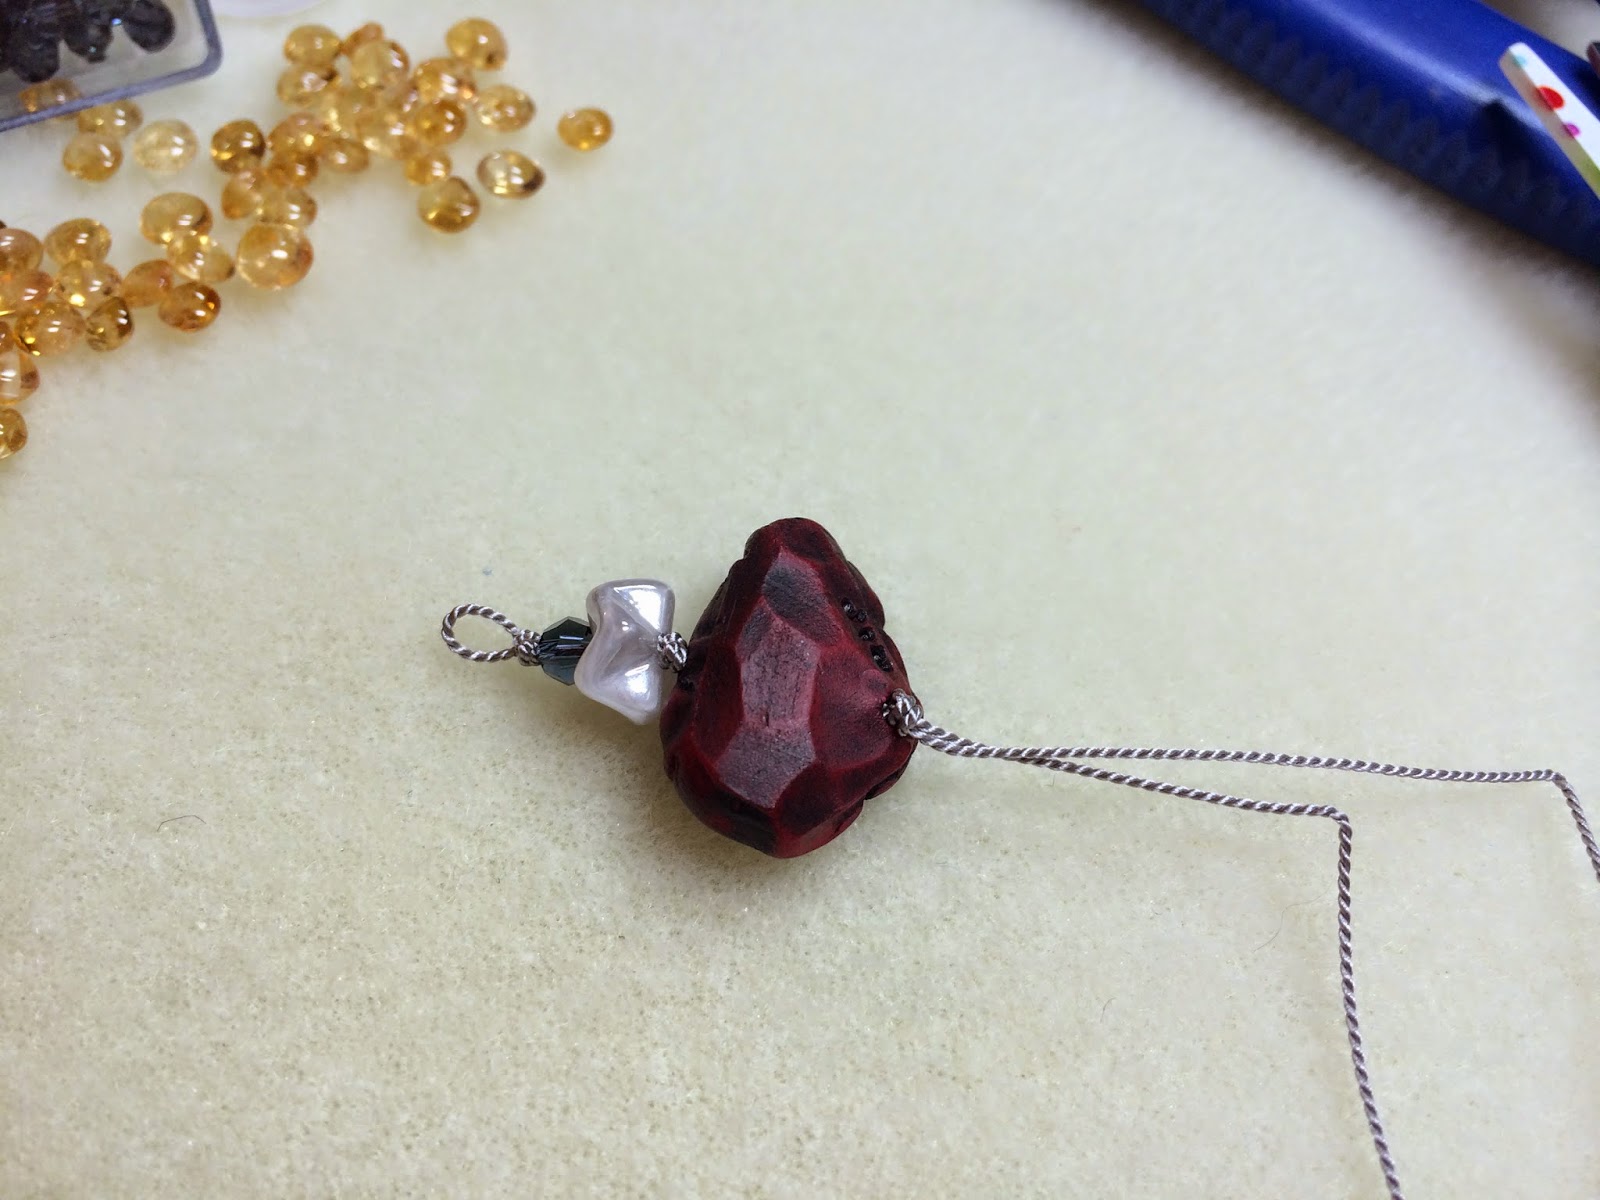

Separate the Silk threads. Thread one rondelle and then one Citrine onto each thread end
(so sorry for the blurry photo!):

Tie a knot under each Citrine at whatever length you desire. I chose to tie my knots on each thread at varied lengths in order to achieve a 'fluttering' effect. Using sharp scissors to prevent the Silk from fraying, trim the ends of the Silk to about 1/8-1/4 inch below the Citrine. You could apply a tiny drop of HypoCement to these ending knots, if desired.
Open a jump ring. Always use pliers to twist a jump ring open. With a pair of pliers held in each hand, gently grasp each side of the jump ring where it is cut. Gently twist one side of the jump ring away from you. This motion opens the jump ring slightly while maintaining its nice, round shape. Slide the opened jump ring through the little thread loop above a crystal. Making sure the Wild Rose bead is oriented to 'face-front', slip the jump ring through an ear wire loop. Carefully close the jump ring in the same way it was opened. Check to be sure the jump ring ends are now tightly 'flush' together and without any gaps showing.
Construct a second earring in the same way...and wa lah!
Here are my completed earrings:
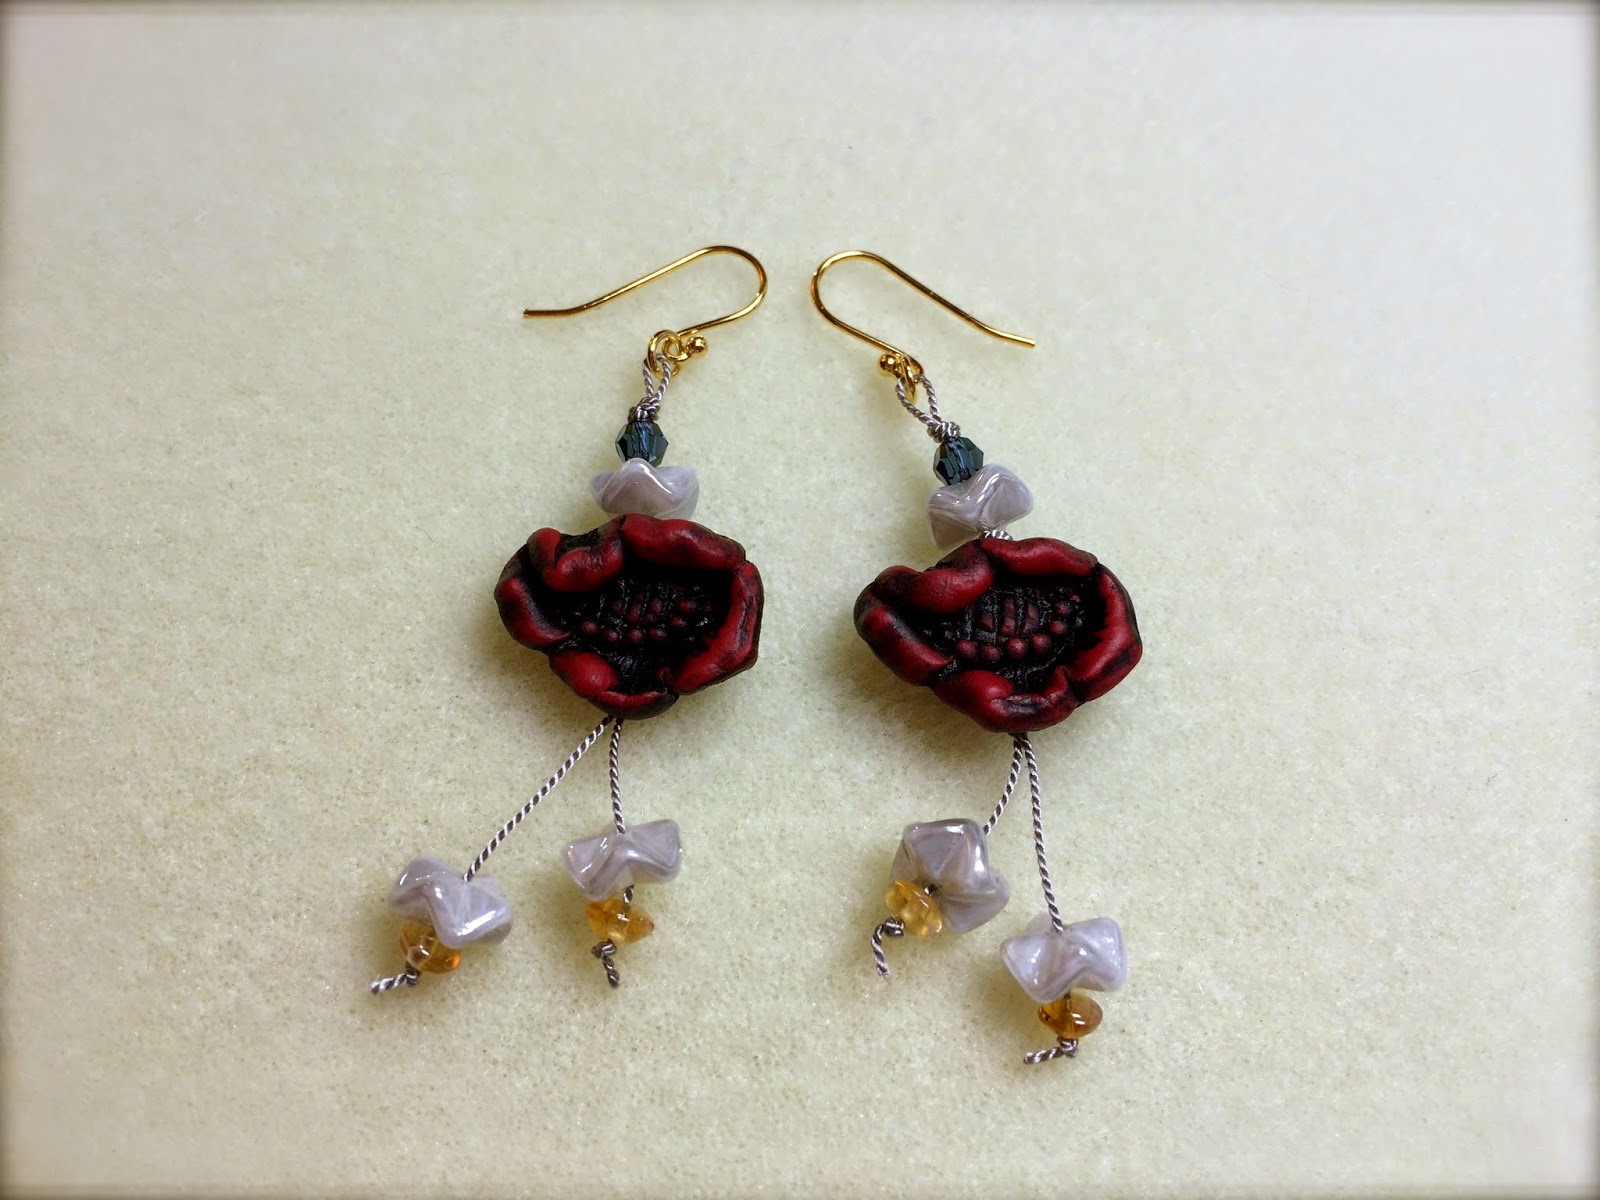
Here is my finished set:

I think they look fabulous together!
Hope you like them, and my first attempt at a mini-turorial!
See you soon,
Carol
Your bracelet was already beautiful and now the earrings! This is a super sweet set! And I love tutorials, thank you so much for sharing this!
ReplyDeleteLove, love! Tassel-y earrings are my favorite—this is such a lovely set Carol! Fabulous tutorial too—thanks for sharing!
ReplyDeleteI think they look fantastic together too...a great pair. Nice tutorial.
ReplyDeletehttp://fairiesmarket.blogspot.com/
The ruffle rondelles and the flower beads are such a good combination and with the earrings.... what a great set!
ReplyDeleteThank you, Terri!! :)
DeleteSuch a great tutorial! I love the rustic nature of those rose beads from Rebekah. And those little ruffled spacers are awesome. I will have to look into those. I have never used silk cord like this but you make it seem so easy. I will have to look into that! Thanks for joining us at the Art Bead Scene! Enjoy the day. Erin
ReplyDeleteThank you so much, Erin! It is such an honor and treat to receive a note from someone with so much experience and awesome talent! You definitely 'made my day'! :)
DeleteThis is a wonderful tutorial -- and gorgeous jewelry, too!
ReplyDelete